If a faucet is leaking or dripping, it’s usually cheaper to repair the faucet than to buy a new one. Sometimes only a few inexpensive O rings and washers need replacing.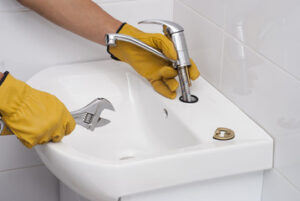
Shut off the water at your home’s main valves, plug the sink drain, and remove the faucet handle(s). Determine what kind of screw holds the handle in place, and have a compatible screwdriver handy. Visit https://www.oneofakind.pro/water-damage-los-angeles/ for more information.
The first step to fixing a faucet is to identify the problem. If the leak comes from the handles, it is usually a gasket that is worn out and no longer provides a tight seal. Replacing the gasket is a simple process that can be done while the handle is removed.
If the leak is from the spout, it is most likely caused by a valve seat that has become corroded. In this case, the faucet will need to be completely disassembled and the valve seat replaced.
Leaks from the handles may also be due to loose screws or decorative caps on the screws. Once the water supply is turned off, remove the faucet handle by unscrewing the screw with a flat-head screwdriver or a Phillips-head screwdriver. If the screw is rusted or stuck, try applying penetrating oil to help loosen it.
Once the handles are removed, you can begin to see the stem nut that holds the cartridge in place. Depending on the type of faucet, this may have a cover that needs to be removed with pliers before you can grip and loosen it. Once the nut is removed, you will be able to pull out the entire cartridge and inspect the O-ring that keeps it in place. This can be replaced with a new O-ring that is purchased in a kit designed specifically for your faucet model.
If the faucet is leaking from the base, it is most likely due to a loosened packing nut or adjusting ring that connects the stream screw to the handle stem. This can be tightened or replaced with a new one, which will fix the leak.
Sometimes water pressure changes can be blamed on the faucet, but this is rarely the case. Most fluctuations in water pressure are caused by clogged pipes or other problems that need to be addressed by a professional plumber. If the change is very noticeable, it may be a sign that there is an issue with the seals or seams in your house’s plumbing system. An experienced plumber will be able to diagnose and fix these issues quickly and effectively.
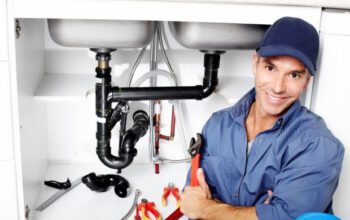
Disassembling the faucet
For faucet repairs, it is important to have the right tools on hand. A good set of work gloves will keep your hands clean as you work, and a small container of vinegar will be helpful to loosen any hard water stains that may be present. You will also need a screwdriver, a wrench, and some type of plier. It’s a good idea to have a bucket underneath the shut-off valves to catch any water that may splash out as you begin to disassemble your faucet.
If you are working with a single lever faucet, you will need to first switch off the water supply by turning the valves under the sink firmly into the “off” position. It’s a good idea to also turn on a nearby sink or tub to flush out the lines and drain any water remaining in the faucet.
Next, you will need to remove the handle from the faucet—a simple task for most people. A screw is usually located in the center of each faucet handle. You can use a wrench or a screwdriver to loosen this screw and then lift off the handle. If you’re lucky, the handle may come off fairly easily; if not, a bit of patience and some pliers should get it free.
Once the handle is off, you will need to loosen the nut that holds the cartridge in place. This can sometimes be difficult, especially if it has been loosened by a previous repair person. To do this, you will need a pair of pliers with the jaws taped off so that they don’t scratch your faucet parts. Once the nut is removed, you should be able to pull off the old cartridge and replace it with a new one.
Cartridge-style faucets are not as common as the traditional ball and stem faucets, but they can be just as easy to fix if they develop problems. If your faucet is leaking at the base, you can typically correct this by replacing the O-rings on the cartridge or even the entire cartridge itself. Replacement cartridges are available at most hardware and home centers, as well as some plumbing supply specialists.
Repairing the handle
The first step is to turn off the water supply using the shut-off valves underneath the sink or in the basement. This eliminates the possibility of a flood if you damage any of the plumbing components during the repair process. You can also put a towel over the drain to help keep any loose parts from falling down the pipes.
Next, remove the handle screw by unscrewing it with a screwdriver. This screw may be recessed into the handle or hidden behind a decorative cap. If it’s hidden, use a knife or flat-head screwdriver to gently pry the cover off and expose the screw. It’s a good idea to keep this screw somewhere safe, as you’ll need it to reassemble the faucet later.
After the handle is removed, you should be able to see a stem nut that holds the cartridge in place. If the nut is stuck, try using penetrating oil. If the nut still won’t come off, use a wrench to slowly loosen it. Once the nut is off, you can pull out the old cartridge and replace it with an identical one. Make sure to buy a replacement with new rubber “O” rings, and consider purchasing some plumber’s grease to lubricate the O-rings when you install them.
Cartridge-style faucets can be a bit more difficult to repair than other styles of faucets. The procedure will vary by manufacturer, but you’ll usually need to remove the handles and a screw that attaches them to the body. There will also be a bonnet or dome that needs to be loosened with an adjustable wrench or pliers, and there will be a locking nut on top of the cartridge that you’ll need to remove with a pipe wrench.
Once you’ve removed all the old components, the new cartridge should go in easily. If it doesn’t, you might need to lubricate the O-rings with plumber’s grease to ensure a snug fit. Once the cartridge is in, you should physically inspect the faucet to ensure that everything is tight and secure. You should also turn on the water to test your work.
Repairing the seat
If your leaking faucet is not caused by a loose handle or by replacing the washer, you may have a faulty valve seat. This is a common problem that can be difficult for homeowners to troubleshoot, but you can fix it with a little work and a few tools.
The valve seat is located inside the faucet body. It seals against a special washer to control water flow. When the seat erodes, the washer can’t seal tightly, and water leaks. To make the repair, you will need a tool known as a valve seat dresser.
This is a small, handheld tool that can be bought for between six and ten bucks at most home improvement stores. It works by polishing the brass on the inside of the faucet to create a smooth surface that is more likely to hold a washer. This makes it easier for the washer to seal against the valve seat.
To use the tool, first turn off your water supply. Then remove the handle by loosening the set screw with a spanner wrench or hex wrench. If the handle is a ball-type faucet, you will need to remove the ball with adjustable pliers before pulling it off the stem. Once the handle is removed, remove the packing nut on the end of the stem with a wrench.
Next, use a flashlight to check the washer seat in the faucet body. If it has a square or hexagonal hole in the center or is slotted for a screwdriver, it can be replaced, but if it doesn’t have these features, you will need to “dress” the worn seat by turning it with a seat-dressing tool until you create an even surface (Fig. 2).
Once the old seat is removed, place a new one into the faucet body and align it with the opening in the faucet. Screw in the valve seat by hand, then tighten it with a wrench until you feel resistance (Fig. 3), but don’t over-tighten, as this can damage the threads on the valve seat. Replace the washers and gaskets and reassemble the assembly. Once you have reassembled the faucet, turn on your water to test for leaks.